In this tutorial we’ll go through step by step how to install VNC Server on Debian 11, Debian 11 was just released a few days ago, so it’s really hot right now. We’ll cover everything from the ground, so no matter what kind of Debian flavor do you have we can use it for this tutorial.
The VNC server we use is TigerVNC which is has been on Debian for so long. TigerVNC know for its stability and ease to use, even to set up it’ll take less than 10 minutes for the beginner.
0. Keep System Up To Date
Keep the system up to date by update it regularly. The way Debian handles the update/upgrade process I trust them, they don’t break my server.
sudo apt update && sudo apt upgrade -y
1. Create New User
Be advised not to run the VNC using a root account, it might break a lot of things on your remote desktop server. Even as a normal user, we can add that user to sudo group to manage the server
sudo adduser jackthis step is optional, if you’re on your user account, move on to the next step. To run multiple user VNC, just add as many as user you want, then create password for each of them on step 4.
2. Install XFCE 4
Debian 11 comes with XFCE 4.16, if you’re using a different Desktop environment, install XFCE using the following command. For remote desktop I prefer using lightweight, to make the experience more smooth, less bandwidth, less lagging, and more productive work.
sudo apt install xfce4 xfce4-goodies dbus-x11 -y
For simple browsing and email, I’ve been good enough with 2 GB memory and 1 vCPU which cost around $5-$10/month depending on the provider.
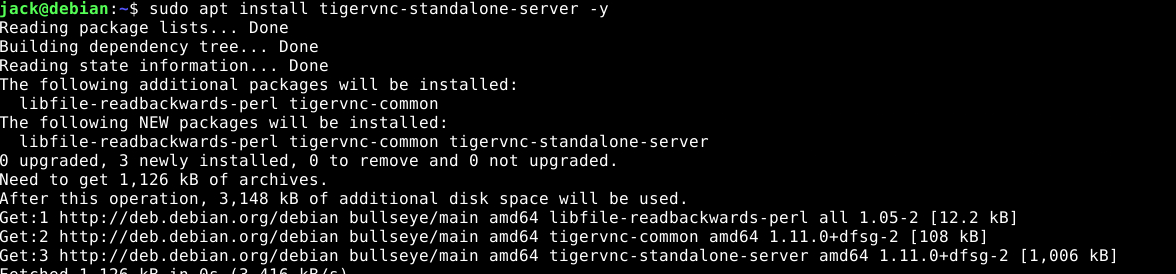
3. Install TigerVNC Server
TigerVNC is my favorite VNC, because of its stability and fast. To install TigerVNC in Debian it’s only taking one-liner
sudo apt install tigervnc-standalone-server -y
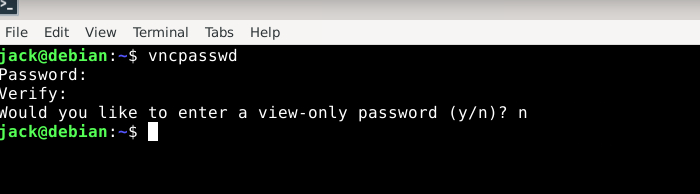
4. VNC Configuration
Login as a non-root user, then create a vnc password for that user
vncpasswd
create file ~/.vnc/xstartup if it doesn’t exist, add following lines
#!/bin/sh
unset SESSION_MANAGER
unset DBUS_SESSION_BUS_ADDRESS
exec /bin/sh /etc/xdg/xfce4/xinitrc
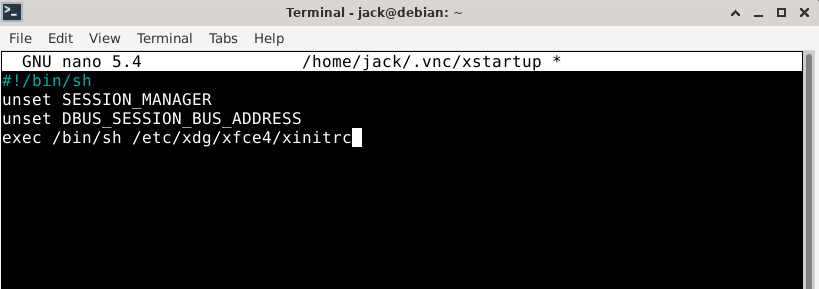
basicly we told TigerVNC to run XFCE init every time we login.
the last thing we need to run is, the TigerVNC server
vncserver -localhost nocheck if vnc running
ss -tunlp | grep vnc

5. Remote VNC Server
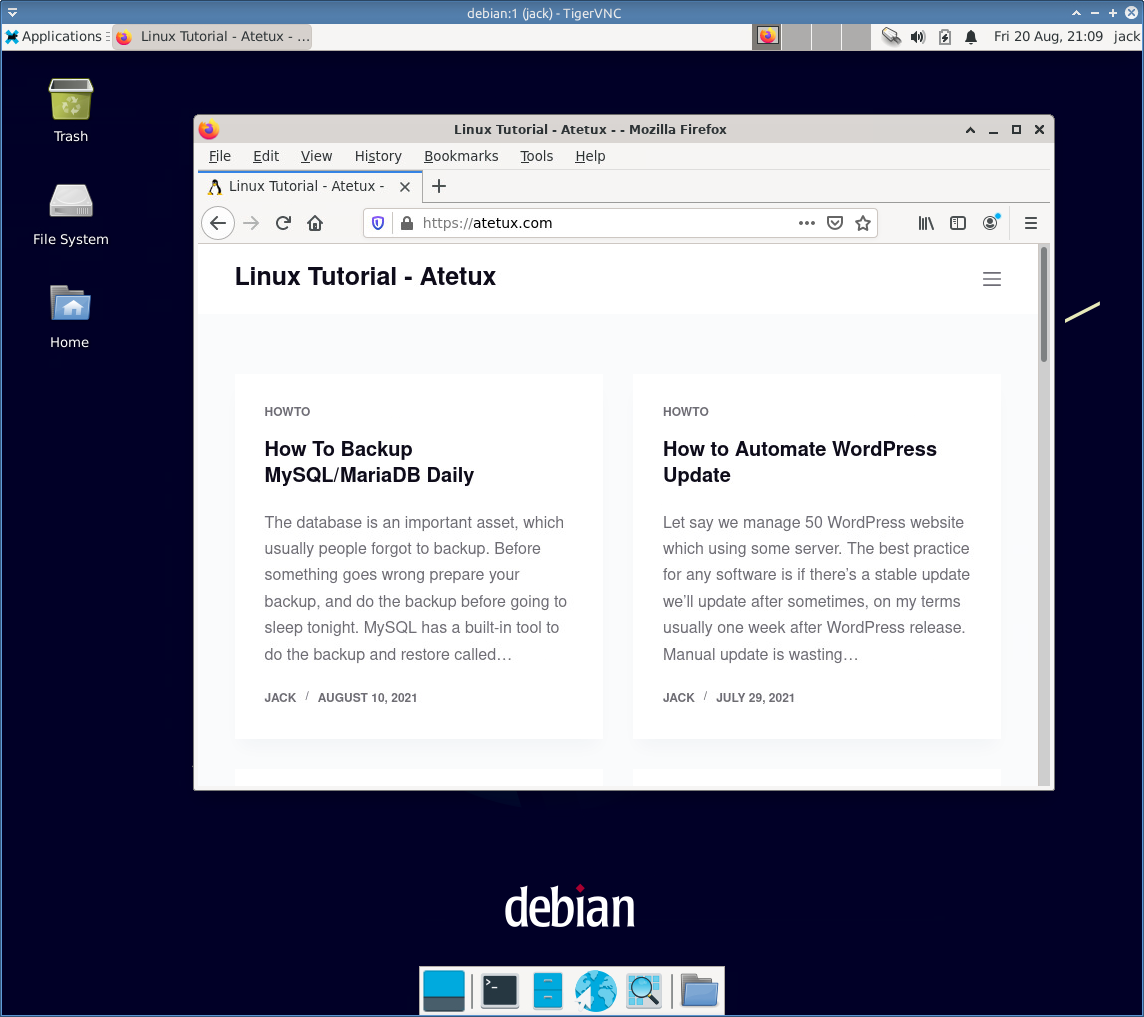
Any VNC client will able to access the VNC Server, I’ll use tigervnc viewer to access VNC server from my computer.
sudo apt install tigervnc-viewer -y
run vncviewer command from terminal. Put the VNC server IP address there, then click Connect button
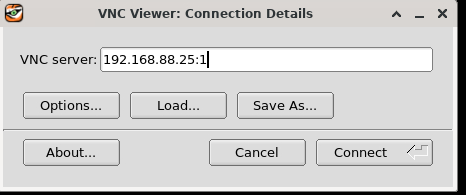
when it ask for password enter your VNC password, which is created on step 4.
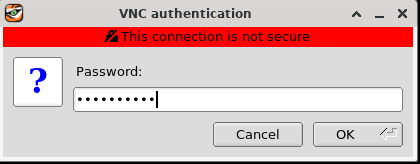
click OK.
Didn’t work.”
(xapp-sn-watcher:40622): GLib-GObject-WARNING **: 17:47:50.121: invalid (NULL) pointer instance
(xapp-sn-watcher:40622): GLib-GObject-CRITICAL **: 17:47:50.122: g_signal_emit_by_name: assertion ‘G_TYPE_CHECK_INSTANCE (instance)’ failed”
Where did you get that error from?
For those who could face to this error while trying to connect from vncviewer : unable to connect to socket: Connection refused (61)
I solved this by adding the port 5091 after the ip adress of the server as : 192.168.88.25:5091