A Samba enables file sharing across different operating systems over a network (LAN or INTERNET). Samba supports sharing between Windows, Linux, macOS, Android and iOS. For HTPC samba can be used to share content between your NAS to Jellyfin or Plex media server.
Install and Update Ubuntu 20.04
Update the packages to the latest available version on Ubuntu 20.04
sudo apt update; sudo apt upgrade -y
Installing Samba
Install samba 4 from official repository, the current stable version of Samba is version 4
sudo apt install samba -y
Add Samba User
Samba use linux user account as it’s user by default, we’wont be able to create samba user without create linux user account first. I’d set samba password for my current user atetux
sudo smbpasswd -a atetux

Config Samba
First, create a folder to share the content
mkdir ~/Data
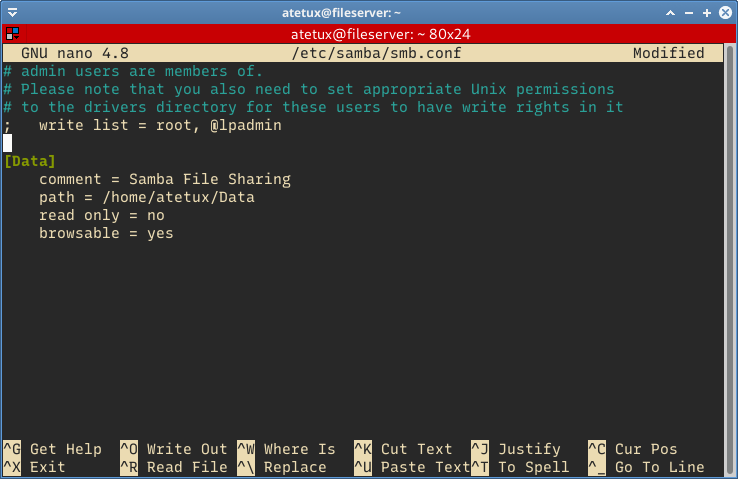
at the bottom of /etc/samba/smb.conf append
[Data]
    comment = Samba File Sharing
    path = /home/USERNAME/Data
    read only = no
    browsable = yes
replace USERNAME with your current username.
Restart and Enable Samba on Boot
sudo systemctl restart smbd
sudo systemctl enable smbd
Open Samba Sharing
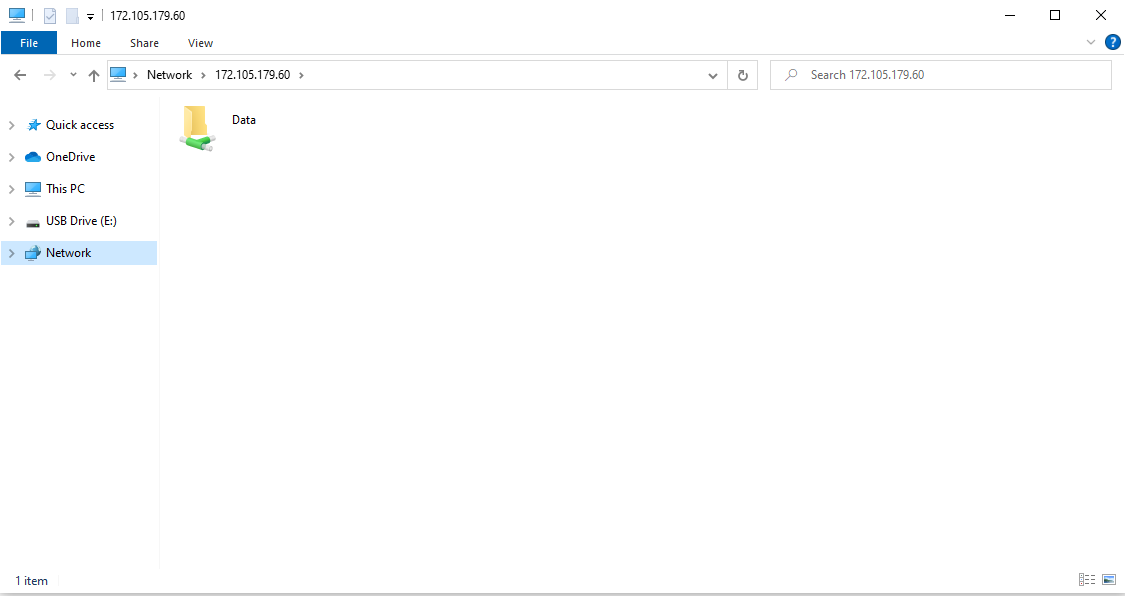
From Windows Explorer open \\SERVER-IP
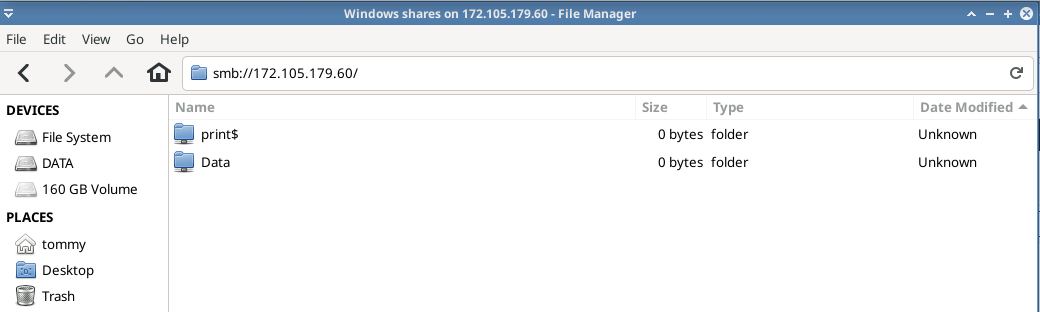
On Thunar File Manager or Nautilus enter smb://172.105.179.60 on address bar