As the most used CMS in the world, WordPress has been used to create blogs, website even landing pages. WordPress has a lot of plugins and themes to choose from, that another reason why it famous in this area.
Installing WordPress on a cloud server can be tricky if you never touch Linux server before, but don’t worry we’ll cover everything for you. For most case these default instalation can handle thousand visitor per day.
Minimum Server Requirement
1 Core
1 GB Memory
10 GB SSD/Hardisk
100 Mbps
Update Debian 10
Before doing any installation, to keep Debian 10 has the latest packages update first. Debian update never breaks compability with the installed version, so it safe to update regularly.
sudo apt update; sudo apt upgrade -y
Prequsition Packages
These packages need to be installed because some of our step-by-step will need these.
sudo apt install curl ssl-cert -y
Install PHP
sudo apt-get install php php-gd php-xmlrpc php-fpm php-curl php-intl php-imagick php-mysql php-zip php-xml php-mbstring php-bcmath -y
Install MariaDB
apt install mariadb-server -y
Keep in mind that MariaDB is case sensitive, WordPress is not the same as wordPress or WordPress.
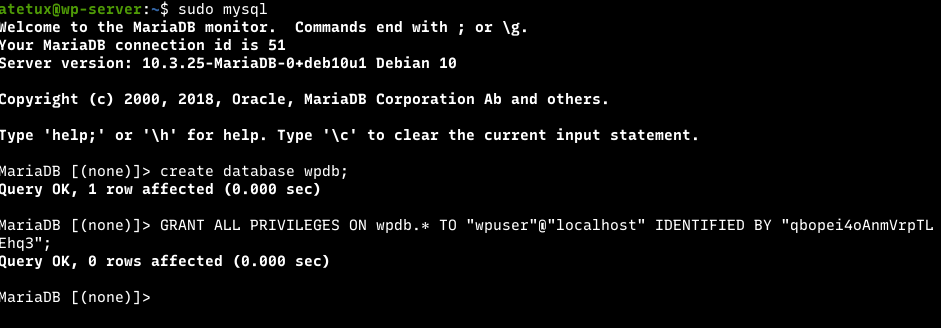
Login as MariaDB root, then create database and user
sudo mysqlCreate database
Create a new database to store WordPress databases
create database wordpress;
Create user database
GRANT ALL PRIVILEGES ON DATABASENAME.* TO "DATABASEUSER"@"localhost" IDENTIFIED BY "SECUREPASSWORD";
Setup WordPress
In this tutorial, we’ll use CLI to install WordPress. If you’re not familiar with the command don’t worry because I’ll teach you step-by-step, the advantages of CLI is it really fast and can be done under 1 minute.
Install WordPress Command Line (wp-cli)
Download wp-cli from the official website
sudo curl https://raw.githubusercontent.com/wp-cli/builds/gh-pages/phar/wp-cli.phar -o /usr/local/bin/wp-cli
Set permission to executable, since we put the file on /usr/local/bin any user can just run wp-cli from anywhere since that location already in Linux path by default.
sudo chmod +x /usr/local/bin/wp-cli
Create a folder to store WordPress files, use the domain name as the folder name.
sudo mkdir /var/www/EXAMPLE.com
Set permission
sudo chown www-data:www-data -R /var/www/EXAMPLE.com
Download latest version of WordPress
sudo -u www-data wp-cli core download --path=/var/www/EXAMPLE.com

don’t worry about permission error above, wp-cli tried to write the cache to folder it’s doesn’t have permission.
WordPress store it’s configuration, such as database, on file wp-config.php. Luck on our side, because wp-cli has it feature build-in. To create wp-config.php use the credential when we create user and database above.
sudo -u www-data wp-cli config create --dbname=wpdb --dbuser=wpuser --dbpass=PASSWORD --dbhost=localhost
Install WordPress
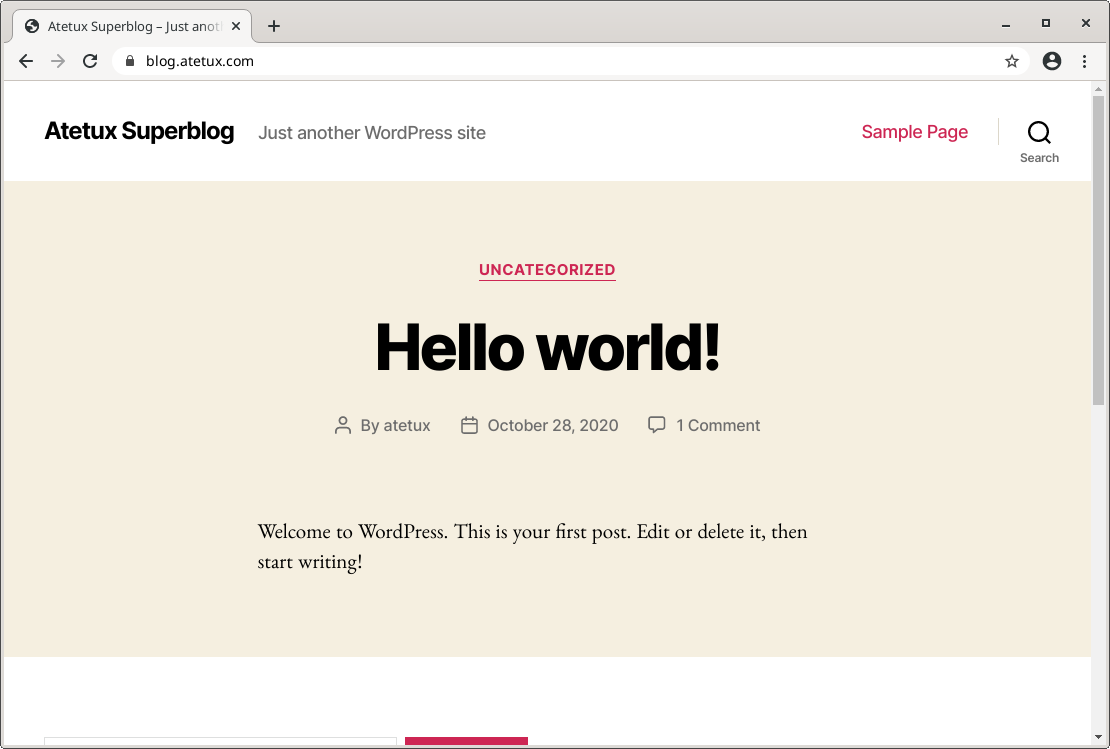
sudo -u www-data wp-cli core install --url=https://EXAMPLE.com --title="Atetux Superblog" --admin_user=atetux --admin_password=SUPER-SECURE-PASSWORD --admin_email=email@domain.com --skip-email

Install nginx
For the webserver will use Nginx, which in many similar testing serving WordPress better than any competitor out there. Installing nginx in Debian is really straigh forward using apt package manager.
sudo apt install nginx -y
Tweak Nginx
Let’s set tweak nginx a little bit to increase the upload limit and worker connection, replace /etc/nginx/nginx.conf with code below
user  www-data;
worker_processes  auto;
pid        /var/run/nginx.pid;
worker_rlimit_nofile 11000;
events {
    worker_connections  10000;
    use epoll;
    multi_accept on;
}

http {
    include       /etc/nginx/mime.types;
    default_type  application/octet-stream;

    sendfile on;
    tcp_nopush on;
    tcp_nodelay on;
    send_timeout 5;
    client_body_timeout 20;
    keepalive_timeout 50;
    server_tokens off;
    client_max_body_size 10M;

    gzip on;
    gzip_min_length 100;
    gzip_comp_level 6;
    gzip_vary on;
    gzip_disable msie6;
    gzip_proxied expired no-cache no-store private auth;
    gzip_types
        text/css
        text/javascript
        text/xml
        text/plain
        text/x-component
        application/javascript
        application/x-javascript
        application/json
        application/xml
        application/rss+xml
        application/atom+xml
        font/truetype
        font/opentype
        application/vnd.ms-fontobject
        image/svg+xml;

    include /etc/nginx/conf.d/*.conf;
    include /etc/nginx/sites-enabled/*;
}
with this nginx configuration, we can upload file/images maximum 10 MB which is enough for most case, if you need more than 10MB change the client_max_body_size line
Nginx Server Block for WordPress
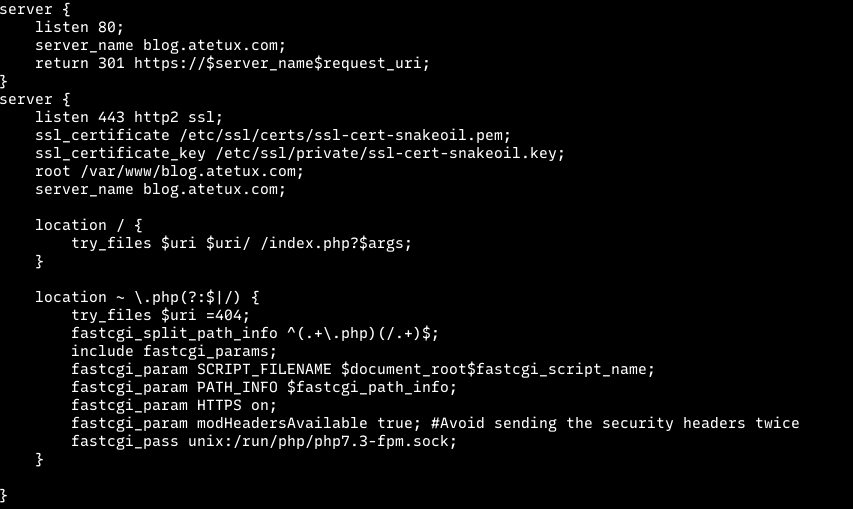
Create a new block server for our domain at /etc/nginx/sites-enabled/EXAMPLE.com
server {
    listen 80;
    server_name EXAMPLE.com;
    return 301 https://$server_name$request_uri;
}
server {
    listen 443 http2 ssl;
    ssl_certificate /etc/ssl/certs/ssl-cert-snakeoil.pem;
    ssl_certificate_key /etc/ssl/private/ssl-cert-snakeoil.key;
    root /var/www/EXAMPLE.com;
    index index.php index.htm index.html;
    server_name EXAMPLE.com;

    location / {
        try_files $uri $uri/ /index.php?$args;
    }

    location ~ \.php(?:$|/) {
        try_files $uri =404;
        fastcgi_split_path_info ^(.+\.php)(/.+)$;
        include fastcgi_params;
        fastcgi_param SCRIPT_FILENAME $document_root$fastcgi_script_name;
        fastcgi_param PATH_INFO $fastcgi_path_info;
        fastcgi_param HTTPS on;
        fastcgi_param modHeadersAvailable true; #Avoid sending the security headers twice
        fastcgi_pass unix:/run/php/php7.3-fpm.sock;
    }

    location ~ /\.well-known {
        root /home/USERNAME/ssl;
    }
}
 .
.
In this case, we’ll set the SSL using a dummy certificate which doesn’t trust by the browser, We’ll revisit this configuration later after SSL generated.
.well-known part used to verify the SSL process, we assign these to the folder which our current user had read/write access. Create folder ssl under user home directory
mkdir ~/ssl
To applied configuration changes, nginx daemon must be restarted
sudo systemctl restart nginxSetup Lets Encrypt SSL
For SSL we’ll setup the Lets Encrypt which offers free SSL, paid or free SSL didn’t have any advantages.
1. Install acme.sh client
curl https://get.acme.sh | sh
reload ~/.bashrc
source ~/.bashrc
2. Request SSL
acme.sh --issue -d DOMAIN --webroot /var/www/DOMAIN

After Lets Encrypt SSL issued open /etc/nginx/sites-enabled/EXAMPLE.com, replace SSL dan certificate file
ssl_certificate /etc/ssl/certs/ssl-cert-snakeoil.pem;
ssl_certificate_key /etc/ssl/private/ssl-cert-snakeoil.key;
in my case
ssl_certificate /home/atetux/.acme.sh/blog.atetux.com/fullchain.cer;
ssl_certificate_key /home/atetux/.acme.sh/blog.atetux.com/blog.atetux.com.key;
check the output of acme.sh above to get the full path.
restart nginx
sudo systemctl restart nginxOpen https://DOMAIN on browser