A lot audio/video application combined out there, such as Plex, Emby or Jellyfin. But most of them develop as video streamer which make the user experience for streaming audio less interested. For many years I’ve been use ampache on AWS EC2 to stream my music. I’ve large music collection, about 100GB from various country/genre, Ampache able to handle that just fine.
Install Dependency
Install dependency for Ampache
sudo apt install unzip wget -y
unzip will be used to extract the ampache source code, while wget used to download the source code.
Install PHP 7
PHP 7.3 comes by default in Debian 10, let’s install it using apt package manager
sudo apt install php php-cli php-common php-gd php-xmlrpc php-fpm php-curl php-intl php-imagick php-mysql php-zip php-xml php-mbstring php-bcmath -y
Install MariaDB Server
Install the latest MariaDB version from the repository
sudo apt install mariadb-server -y
Create database and user for Ampache
Ampache uses MySQL to store its databases, for this application we’ll create a new database and user.
Database name : ampache
Database user : ampache
I prefer using application names both for database and user to keep it simple and easy to spot when managing a lot of databases for various applications.
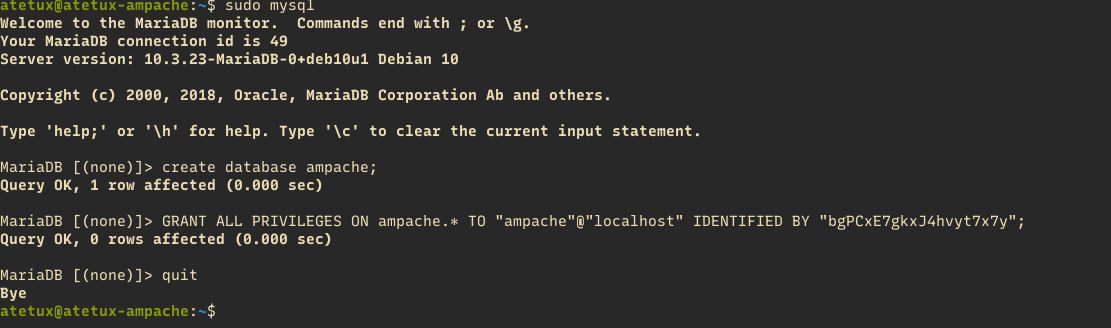
Login as mysql root
sudo mysqlCreate database
create database ampache
assign user to ampache database
GRANT ALL PRIVILEGES ON ampache.* TO "ampache"@"localhost" IDENTIFIED BY "STRONGPASSWORD";
replace STRONGPASSWORD with random secure password.
Install Nginx Web Server
sudo apt install nginx -y
Install Lets Encrypt SSL
We’ll use the free Let’s Encrypt SSL for Ampache services.
sudo apt-get install python-certbot-nginx -y
Create a new server block for your Ampache domain (ex. ampache.domain.com), replace these domain with your own.
sudo nano /etc/nginx/sites-enabled/ampache.domain.com.conf
copy belowing code
server {
    listen 80;
    root /var/www/html;
    index index.php;
    server_name ampache.domain.com;
}
Generate SSL using certbot
sudo certbot --register-unsafely-without-email -d ampache.domain.com
When asked :
Please read the Terms of Service at …. Enter A (Agree)
Please choose whether or not to redirect HTTP traffic to HTTPS, removing HTTP access. Enter 1 (No redirect)
full log
atetux@atetux-ampache:~$ sudo certbot --register-unsafely-without-email  -d ampache.atetux.com
Saving debug log to /var/log/letsencrypt/letsencrypt.log
Plugins selected: Authenticator nginx, Installer nginx
Registering without email!

- - - - - - - - - - - - - - - - - - - - - - - - - - - - - - - - - - - - - - - -
Please read the Terms of Service at
https://letsencrypt.org/documents/LE-SA-v1.2-November-15-2017.pdf. You must
agree in order to register with the ACME server at
https://acme-v02.api.letsencrypt.org/directory
- - - - - - - - - - - - - - - - - - - - - - - - - - - - - - - - - - - - - - - -
(A)gree/(C)ancel: A
Obtaining a new certificate
Performing the following challenges:
http-01 challenge for ampache.atetux.com
Waiting for verification...
Cleaning up challenges
Deploying Certificate to VirtualHost /etc/nginx/sites-enabled/ampache.atetux.com.conf

Please choose whether or not to redirect HTTP traffic to HTTPS, removing HTTP access.
- - - - - - - - - - - - - - - - - - - - - - - - - - - - - - - - - - - - - - - -
1: No redirect - Make no further changes to the webserver configuration.
2: Redirect - Make all requests redirect to secure HTTPS access. Choose this for
new sites, or if you're confident your site works on HTTPS. You can undo this
change by editing your web server's configuration.
- - - - - - - - - - - - - - - - - - - - - - - - - - - - - - - - - - - - - - - -
Select the appropriate number [1-2] then [enter] (press 'c' to cancel): 1

- - - - - - - - - - - - - - - - - - - - - - - - - - - - - - - - - - - - - - - -
Congratulations! You have successfully enabled https://ampache.atetux.com

You should test your configuration at:
https://www.ssllabs.com/ssltest/analyze.html?d=ampache.atetux.com
- - - - - - - - - - - - - - - - - - - - - - - - - - - - - - - - - - - - - - - -

IMPORTANT NOTES:
 - Congratulations! Your certificate and chain have been saved at:
   /etc/letsencrypt/live/ampache.atetux.com/fullchain.pem
   Your key file has been saved at:
   /etc/letsencrypt/live/ampache.atetux.com/privkey.pem
   Your cert will expire on 2020-12-23. To obtain a new or tweaked
   version of this certificate in the future, simply run certbot again
   with the "certonly" option. To non-interactively renew *all* of
   your certificates, run "certbot renew"
 - Your account credentials have been saved in your Certbot
   configuration directory at /etc/letsencrypt. You should make a
   secure backup of this folder now. This configuration directory will
   also contain certificates and private keys obtained by Certbot so
   making regular backups of this folder is ideal.
 - If you like Certbot, please consider supporting our work by:

   Donating to ISRG / Let's Encrypt:   https://letsencrypt.org/donate
   Donating to EFF:                    https://eff.org/donate-le
Check the server block for ampache.domain.com.conf, certbot add 5 new lines start from listen 443 line.
server {
    listen 80;
    root /var/www/html;
    index index.php;
    server_name ampache.atetux.com;

    listen 443 ssl; # managed by Certbot
    ssl_certificate /etc/letsencrypt/live/ampache.atetux.com/fullchain.pem; # managed by Certbot
    ssl_certificate_key /etc/letsencrypt/live/ampache.atetux.com/privkey.pem; # managed by Certbot
    include /etc/letsencrypt/options-ssl-nginx.conf; # managed by Certbot
    ssl_dhparam /etc/letsencrypt/ssl-dhparams.pem; # managed by Certbot

}
changes that server block to
server {
    listen 80;
    root /var/www/html/ampache;
    index index.php;
    server_name ampache.atetux.com;

    listen 443 ssl; # managed by Certbot
    ssl_certificate /etc/letsencrypt/live/ampache.atetux.com/fullchain.pem; # managed by Certbot
    ssl_certificate_key /etc/letsencrypt/live/ampache.atetux.com/privkey.pem; # managed by Certbot
    include /etc/letsencrypt/options-ssl-nginx.conf; # managed by Certbot
    ssl_dhparam /etc/letsencrypt/ssl-dhparams.pem; # managed by Certbot

    location ~ \.php(?:$|/) {
        fastcgi_split_path_info ^(.+?\.php)(\/.*|)$;
        try_files $fastcgi_script_name =404;
        include fastcgi_params;
        fastcgi_param SCRIPT_FILENAME $document_root$fastcgi_script_name;
        fastcgi_param PATH_INFO $fastcgi_path_info;
        fastcgi_param HTTPS on;
        fastcgi_param modHeadersAvailable true;
        fastcgi_pass unix:/run/php/php7.3-fpm.sock;
        fastcgi_intercept_errors on;
    }

}
restart nginx
sudo systemctl restart nginxInstall Ampache Application
Download Ampache
Download the latest Ampache, currently version 4.2.2
wget https://github.com/ampache/ampache/releases/download/4.2.2/ampache-4.2.2_all.zip
Extract the zip file, to /var/www/html/ampache
sudo unzip ampache-4.2.2_all.zip -d /var/www/html/ampache
Ampache Web Installer
The next step is to install Ampache via web Installer, open https://ampache.domain.com on browser
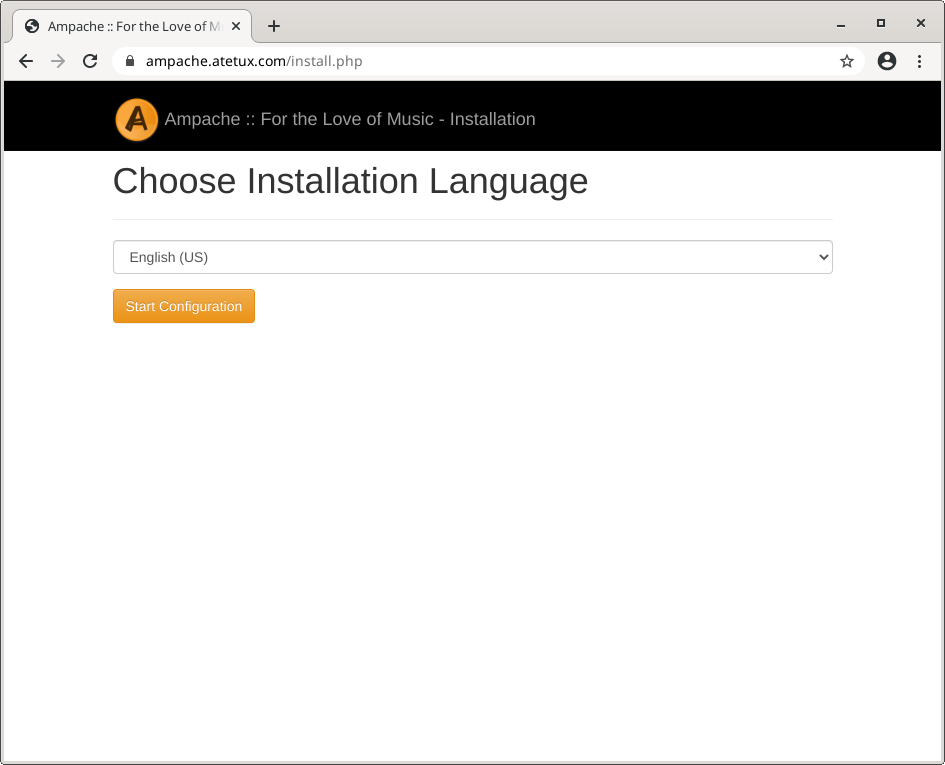
click Start configuration
Scroll down, then click Continue

Database Settings
Enter the database credentials, remember to uncheck create databases.
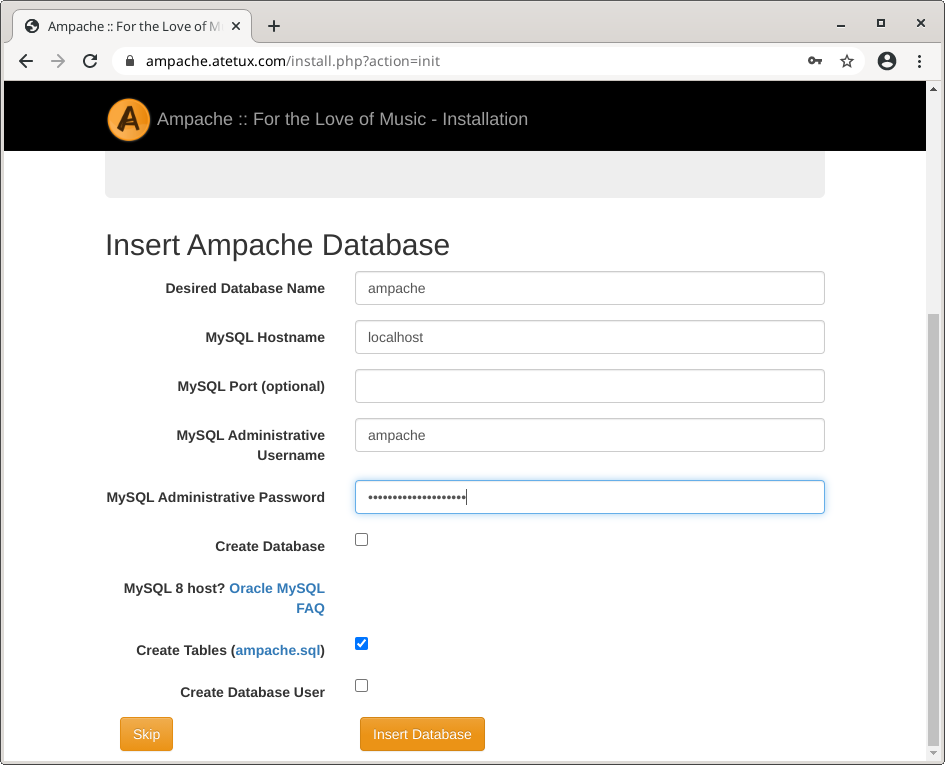
click Create database
Scroll down to File Insight part
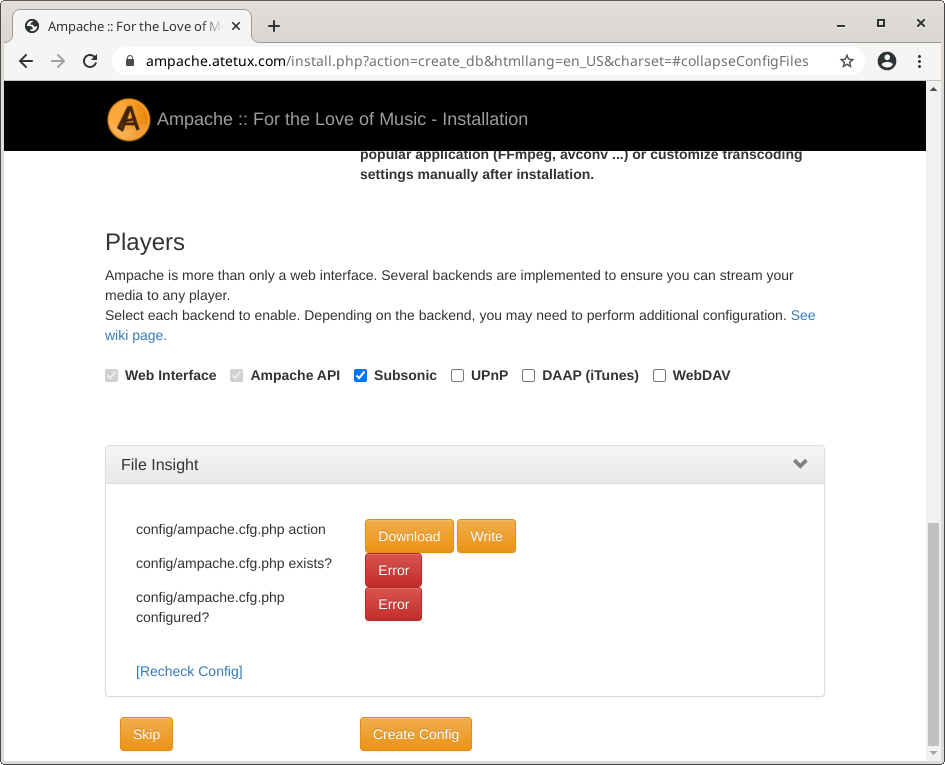
click Write, to write configuration file to /var/www/html/ampache/config/ampache.cfg.php directly
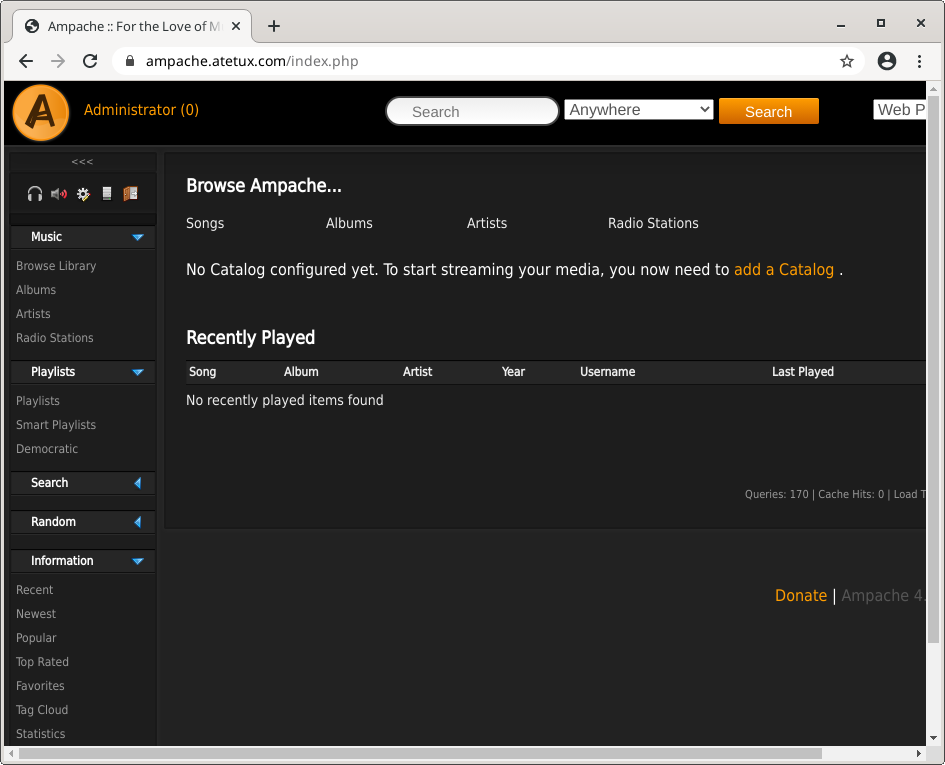
Create Admin Account

Use other than admin for admin account, it’s to avoid brute-force from random bot out there.
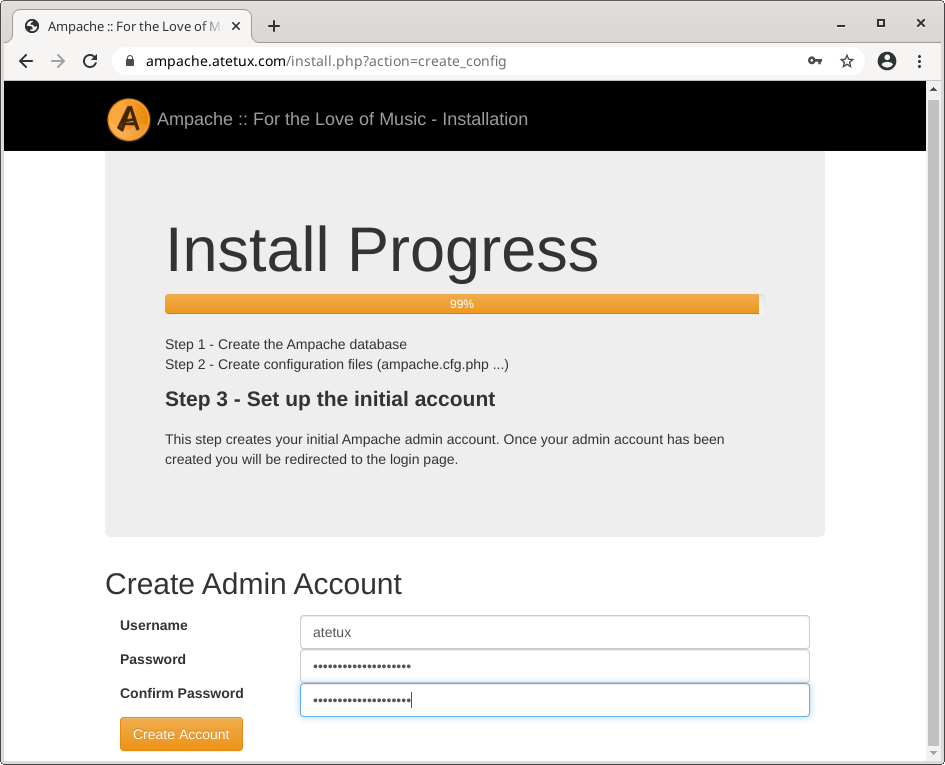
click Create Account
Now we can login via https://ampache.domain.com, to start manage/upload our collections